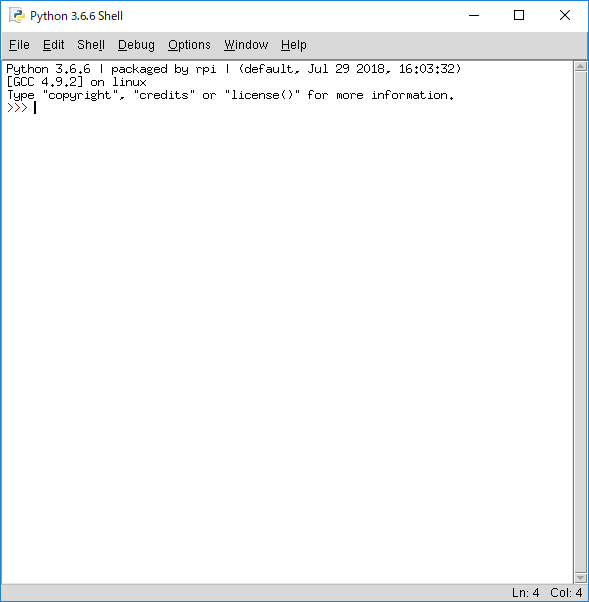
以下のようにRaspberryPi にAnacondaを入れてみました。
・https://urashita.com/archives/26622
今回、さらにRaspberryPi でPythonのIDLE、開発環境を作る方法をまとめてみました。
目次
Anaconda で仮想環境を作る
仮想環境を作る方法
$ conda create -n (仮想環境名) pytyon=3
で、python 3の仮想環境を構築できます。
pythonの引数がないと、python 2の仮想環境ができるようです。
|
1 2 3 4 5 6 7 8 9 10 11 12 13 14 15 16 17 18 19 20 21 22 23 24 25 26 27 28 29 30 31 32 33 34 35 36 37 38 39 40 41 42 43 44 45 46 47 48 49 50 51 52 53 54 55 56 57 58 59 60 |
pi@xxx-pi:~ $ conda create -n test2 Solving environment: done ## Package Plan ## environment location: /home/pi/berryconda3/envs/test2 Proceed ([y]/n)? y Preparing transaction: done Verifying transaction: done Executing transaction: done # # To activate this environment, use: # > source activate test2 # # To deactivate an active environment, use: # > source deactivate # pi@xxx-pi:~ $ conda create -n test3 python=3 Solving environment: done ## Package Plan ## environment location: /home/pi/berryconda3/envs/test3 added / updated specs: - python=3 The following NEW packages will be INSTALLED: ca-certificates: 2018.4.16-0 certifi: 2018.4.16-py36_0 ncurses: 5.9-0 openssl: 1.0.2l-0 pip: 18.0-py36_1 python: 3.6.6-0 readline: 6.3-0 setuptools: 40.0.0-py36_1 sqlite: 3.15.0-0 tk: 8.6.6-0 wheel: 0.31.1-py36_1 xz: 5.2.2-0 zlib: 1.2.11-0 Proceed ([y]/n)? y Preparing transaction: done Verifying transaction: done Executing transaction: done # # To activate this environment, use: # > source activate test3 # # To deactivate an active environment, use: # > source deactivate # |
仮想環境を確認する方法
$ conda info -e
で仮想環境を確認できます。
|
1 2 3 4 5 6 |
pi@xxx-pi:~ $ conda info -e # conda environments: # base * /home/pi/berryconda3 test2 /home/pi/berryconda3/envs/test2 test3 /home/pi/berryconda3/envs/test3 |
ここで、*はアクティブな環境です。
仮想環境を削除する方法
$ conda remove -n (仮想環境名) --all
で仮想環境を削除できます。
|
1 2 3 4 5 6 7 8 9 10 11 |
pi@xxx-pi:~ $ conda remove -n test2 --all Remove all packages in environment /home/pi/berryconda3/envs/test2: ## Package Plan ## environment location: /home/pi/berryconda3/envs/test2 Proceed ([y]/n)? y |
仮想環境をアクティブにする方法
$ source activate (仮想環境名)
で仮想環境をアクティブにすることが出来ます。
アクティブになると
(仮想環境名) pi@xxx-pi:~$
のようにコマンドプロンプト左側に(仮想環境名) が入ってきます。
|
1 2 3 4 5 6 |
pi@xxx-pi:~ $ source activate test3 (test3) pi@xxx-pi:~ $ conda info -e # conda environments: # base /home/pi/berryconda3 test3 * /home/pi/berryconda3/envs/test3 |
仮想環境を非アクティブにする方法
$ source deactivate
で仮想環境を非アクティブにすることが出来ます。
|
1 2 3 4 5 6 |
(test3) pi@xxx-pi:~ $ source deactivate pi@xxx-pi:~ $ conda info -e # conda environments: # base * /home/pi/berryconda3 test3 /home/pi/berryconda3/envs/test3 |
仮想環境でPythonの開発環境を作る
仮想環境 test3 をアクティブにします。
|
1 2 |
pi@xxx-pi:~ $ source activate test3 (test3) pi@xxx-pi:~ $ |
開発に必要なライブラリをインストールします。
|
1 2 3 4 5 6 7 8 9 10 11 12 13 14 15 16 17 18 19 20 21 22 23 24 25 26 27 28 29 30 31 32 33 34 35 36 37 38 39 40 41 42 43 44 45 |
(test3) pi@xxx-pi:~ $ conda install -y numpy scipy scikit-learn pillow matplotlib pandas seaborn Solving environment: done ## Package Plan ## environment location: /home/pi/berryconda3/envs/test3 added / updated specs: - matplotlib - numpy - pandas - pillow - scikit-learn - scipy - seaborn The following NEW packages will be INSTALLED: backports: 1.0-py_2 backports.functools_lru_cache: 1.5-py_1 cycler: 0.10.0-py_1 freetype: 2.7-0 jpeg: 9b-0 libgfortran: 3.0.0-1 libpng: 1.6.28-0 libtiff: 4.0.6-0 matplotlib: 2.1.2-py36hf1f164f_0 numpy: 1.14.0-py36hebd9de5_0 openblas: 0.2.19-0 pandas: 0.23.3-py36_0 patsy: 0.5.0-py_1 pillow: 3.4.2-py36_0 pyparsing: 2.2.0-py_1 python-dateutil: 2.6.1-py_0 pytz: 2018.5-py_0 scikit-learn: 0.19.1-py36h8eb7a42_0 scipy: 1.0.0-py36h89f1728_0 seaborn: 0.9.0-py_0 six: 1.11.0-py36_1 statsmodels: 0.8.0-py36hbbd6ba0_0 Preparing transaction: done Verifying transaction: done Executing transaction: done |
|
1 2 3 4 5 6 7 8 |
(test3) pi@xxx-pi:~ $ pip install pydotplus Looking in indexes: https://pypi.org/simple, https://www.piwheels.org/simple Collecting pydotplus Downloading https://www.piwheels.org/simple/pydotplus/pydotplus-2.0.2-py3-none-any.whl Requirement already satisfied: pyparsing>=2.0.1 in ./berryconda3/envs/test3/lib/python3.6/site-packages (from pydotplus) (2.2.0) Installing collected packages: pydotplus Successfully installed pydotplus-2.0.2 (test3) pi@xxx-pi:~ $ |
REPL とは
REPLとは、Read-Eval-Print Loopの略です。
入力・評価・出力のループのことで、インタプリタ言語において、ユーザーとインタプリタが対話的にコードを実行します。
REPLの読み方は、リプルです。
$ python
で python の REPL が起動します。
IDLE とは
IDLEとは、Python用のGUI統合開発環境です。
マルチウィンドウ型のテキストエディタであり、バージョン1.5.2b1以降のPythonに標準で付属しています。
$ idle
で python2 の IDLE が起動します。
$ idle3
で python3 の IDLE が起動します。
また、コマンドの後ろに&をつけると、バックグラウンドで起動します。
idleは、Xサーバーを必要とするので、MobaXtermのようなXサーバー付きのターミナルエミュレーターを使います。
MobaXterm を使うと、IDLEのGUIが起動します。
|
1 |
(test3) pi@xxx-pi:~ $ idle3& |
Windows PowerShell のようなターミナルエミュレーターの場合、以下のようにDisplay環境変数が設定されていないというエラーがでて起動しません。
|
1 2 3 4 5 6 7 8 9 10 |
(test3) pi@xxx-pi:~ $ idle3 Traceback (most recent call last): File "/home/pi/berryconda3/envs/test3/bin/idle3", line 5, in main() File "/home/pi/berryconda3/envs/test3/lib/python3.6/idlelib/pyshell.py", line 1472, in main root = Tk(className="Idle") File "/home/pi/berryconda3/envs/test3/lib/python3.6/tkinter/__init__.py", line 2020, in __init__ self.tk = _tkinter.create(screenName, baseName, className, interactive, wantobjects, useTk, sync, use) _tkinter.TclError: no display name and no $DISPLAY environment variable (test3) pi@xxx-pi:~ $ |
IDLEを使いたい場合は、MobaXtermを使いましょう。
Raspberry Piの関連記事
ラズパイに関する関連記事をまとめてみました。
↓Raspberry Piとは
・https://urashita.com/archives/25631
↓Raspbian Stretch with desktopのインストール
・https://urashita.com/archives/26460
↓Raspberry PiにAnacondaをインストール
・https://urashita.com/archives/26622
↓Raspberry PiとRespeaker 2-Mics Pi HAT
・https://urashita.com/archives/28039


コメント
[…] […]