↓SSLの証明書を買うにはSSLボックス
このたび、 無料のhttps(SSL)証明書であるLet's Encryptをインストール&セットアップしてみました。
目次
Googleも推奨のhttps(SSL)証明書を導入しよう
Googleウェブマスター向けの公式ブログで
「HTTPS ページが優先的にインデックスに登録されるようになります」
(2015年12月18日)とアナウンスがありました。
そろそろSSL対応を本格的に考えていく時期になってきたようです。
HTTPSの証明書(SSL証明書)は、SSLボックスから購入することが可能です。
↓SSLを買うには以下から購入します。
導入方法は以下にまとめました。
この場合、年間1,500円から15,000円程度かかります。
無料で証明書を作る方法としては、以下のようなオレオレ証明書のような方法もあります。

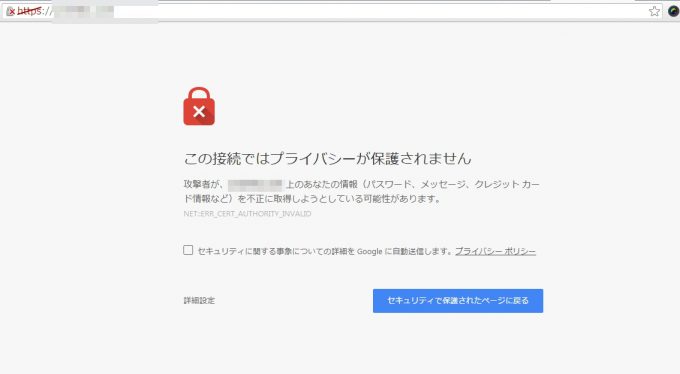
ただし、オレオレ証明書で作った証明書にブラウザでアクセスすると、こんなエラーメッセージが表示されます。
この接続ではプライバシーが保護されません
攻撃者が、(ドメイン名 aaa.bbb) 上のあなたの情報(パスワード、メッセージ、クレジット カード情報など)を不正に取得しようとしている可能性があります。
NET::ERR_CERT_AUTHORITY_INVALID
セキュリティに関する事象についての詳細を Google に自動送信します。プライバシー ポリシー
無料のhttps(SSL)証明書であるLet's Encrypt とは
この方法以外に無料で証明書を取得する方法がないかと調べてみたところ、無料のSSLで有名な Let's Encrypt が2016年4月12日にベータ版を終了し、正式リリースになったようです。
Let’s Encryptの読み方は、レッツエンクリプトです。
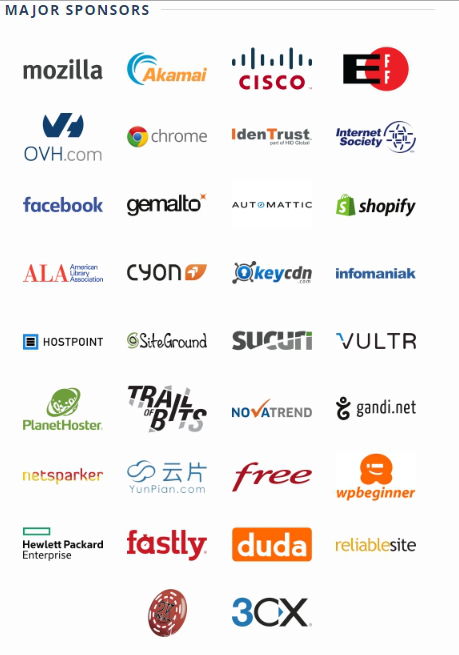
Let's Encryptは、GoogleやFirefox、Cisco、Facebook、ヒューレットパッカードがスポンサーになっているので安心できますね。
主なスポンサー企業は次の通りです。
Let's Encryptの導入前提
証明書の種類
Let's Encryptで発行される証明書は、ドメインの所有者であることを示すドメイン証明(DV)です。
法人の組織証明(OV)や、実在証明(EV)は出ません。
ドメイン証明(DV)なので、ドメインに対して、所有者かどうかは、Let's Encrypt側から確認されます。
証明書を発行する場所
これから導入方法を説明しますが、ドメインを設置しているサーバー側のLinuxで、コマンドベースで証明書を発行します。
従いまして、root権限のないレンタルサーバーや、ドメインの設定されていないサーバーでは証明書を発行できません。
また、証明書を発行するにあたり、一時的にApacheやnginxなどのWebサーバーを停止する必要があります。
yumを使うため、Windowsやdebian系のLinuxでは、Let's Encryptは使えないのではないかと思います(単に私が方法を知らないだけかもしれません)。
証明書の有効期間
SSLの有効期間は90日間です。
90日ごとに再発行が必要となります。
Let's Encryptの導入方法
Let's Encryptの導入につきましては、Let's Encrypt の使い方 で詳しい日本語の解説があります。
基本、この通りにやってみるとインストール出来ます。
まず、ドメインを設定してあるサーバーで、sudo 権限のある一般ユーザーでログインします。
github から certbot をダウンロードします。
|
1 2 3 4 5 6 7 |
$ git clone https://github.com/certbot/certbot Cloning into 'certbot'... remote: Counting objects: 36542, done. remote: Compressing objects: 100% (92/92), done. remote: Total 36542 (delta 50), reused 1 (delta 1), pack-reused 36449 Receiving objects: 100% (36542/36542), 9.80 MiB | 70.00 KiB/s, done. Resolving deltas: 100% (26021/26021), done. |
証明書を発行してみます。
|
1 2 3 |
$ cd certbot/ $ ./certbot-auto |
sudoでroot権限に昇格後、yum を使って証明書作成に必要なファイルがインストールされます。
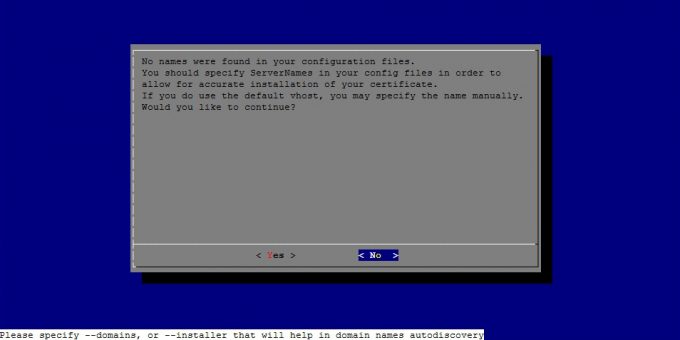
インストール後、Certbotが起動して以下のように表示されます。
No names were found in your configuration files.
You should specify ServerNames in your config files in order to
allow for accurate installation of your certificate.
If you do use the default vhost, you may specify the name manually.
Would you like to continue?
このように表示された場合、<No> を押して終了します。
certbot-auto を起動して証明書を作成します。
|
1 |
$ ./certbot-auto certonly --standalone -d (ドメイン名 aaa.bbb) |
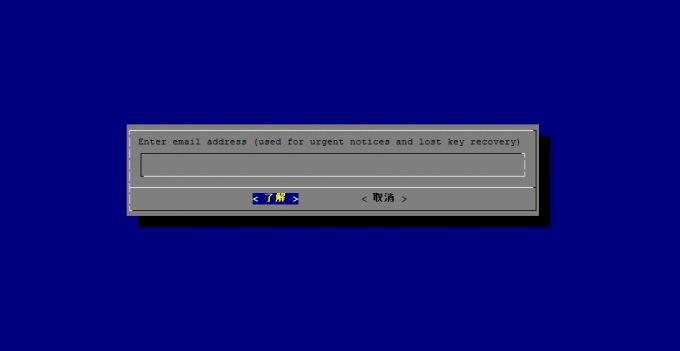
Enter email address (used for urgent notices and lost key recovery)」
と表示されたら、メールアドレスを入力して「了解」を押します。
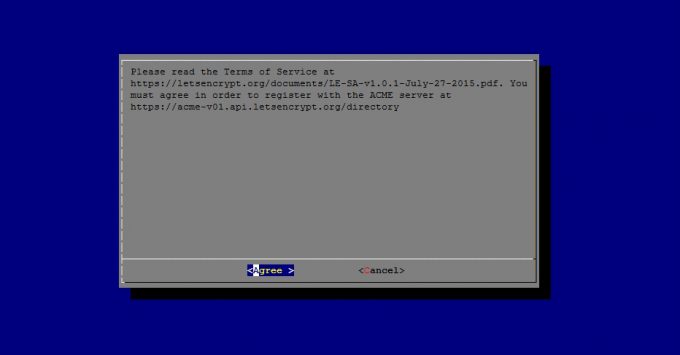
Please read the Terms of Service at
https://letsencrypt.org/documents/LE-SA-v1.0.1-July-27-2015.pdf.
You must agree in order to register with the ACME server at
https://acme-v01.api.letsencrypt.org/directory
と表示されたら「Agree」を押します。
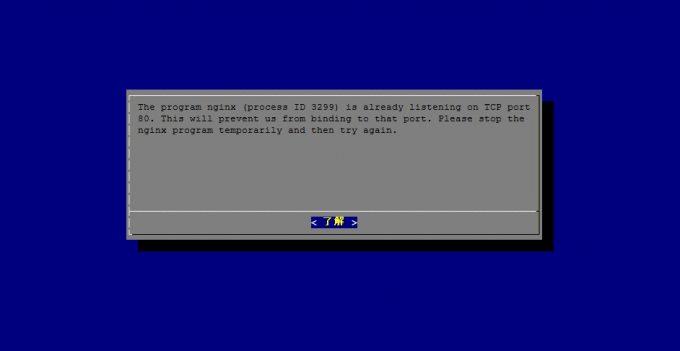
ところが、その後
The program nginx (process ID 3299) is already listening on TCP port 80.
This will prevent us from binding to that port.
Please stop the nginx program temporarily and then try again.
と表示されてしまいました。
なんと、証明書を発行するのにいったん、WEBサーバーを停止する必要があるのです。
(運用中のサーバーなら無理でしょ?)
やむをえず、nginxを停止します。
|
1 2 |
# service nginx stop Redirecting to /bin/systemctl stop nginx.service |
再度、certbot-auto で証明書を発行してみます。
|
1 2 3 4 5 6 7 8 9 10 11 12 13 14 15 16 17 18 19 20 |
$ ./certbot-auto certonly --standalone -d (ドメイン名 aaa.bbb) Requesting root privileges to run certbot... /home/xxx/.local/share/letsencrypt/bin/letsencrypt certonly --standalone -d (ドメイン名 aaa.bbb) Failed authorization procedure. (ドメイン名 aaa.bbb) (tls-sni-01): urn:acme:error:connection :: The server could not connect to the client to verify the domain :: Failed to connect to www.xxx.yyy.zzz:443 for TLS-SNI-01 challenge IMPORTANT NOTES: - The following errors were reported by the server: Domain: (ドメイン名 aaa.bbb) Type: connection Detail: Failed to connect to www.xxx.yyy.zzz:443 for TLS-SNI-01 challenge To fix these errors, please make sure that your domain name was entered correctly and the DNS A record(s) for that domain contain(s) the right IP address. Additionally, please check that your computer has a publicly routable IP address and that no firewalls are preventing the server from communicating with the client. If you're using the webroot plugin, you should also verify that you are serving files from the webroot path you provided. |
またもやエラー。
ポート443に接続できない。。
どうやら、httpsの証明書を発行するためには、ポート443で待ち受ける必要があるようです。。
ポート443のための証明書を作成するのに443に接続できるように設定が必要?らしいということに、おおいなる矛盾を感じつつも、デフォルトで導入されている証明書を使って443で待ち受けることが可能な設定にします。
/etc/nginx/conf.d/ssl.conf に以下のように /etc/pki の証明書の設定を追加しておきます。
|
1 2 3 4 5 |
listen 443 default ssl; ssl on; ssl_certificate /etc/pki/tls/certs/localhost.crt; ssl_certificate_key /etc/pki/tls/private/localhost.key; |
上記の設定が間違っていないことを、下記のコマンドで確認しておきます。
|
1 |
# nginx -t -c /etc/nginx/nginx.conf |
次に、ポート443に対して外部からアクセスできるように、ファイアウォールを空けておきます。
CentOS 7の場合、firewall-cmd を使います。
firewall-cmd の使い方は以下で説明しておきました。
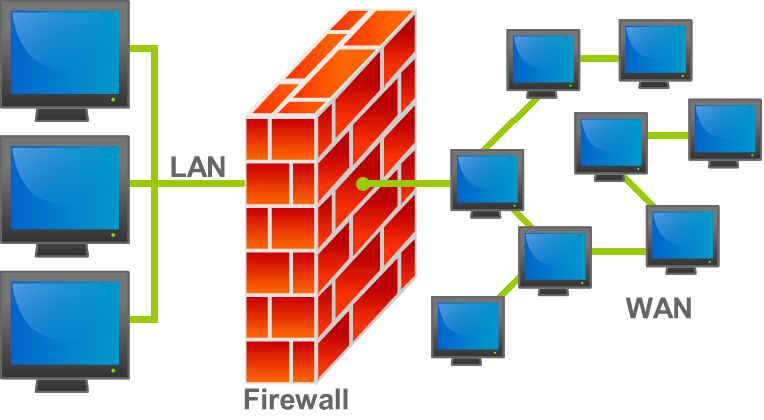
まず、firewall-cmd --list-all でポートが空いているかどうか確認します。
|
1 2 3 4 5 6 7 8 9 10 |
# firewall-cmd --list-all public (default, active) interfaces: eth0 sources: services: dhcpv6-client http ports: masquerade: no forward-ports: icmp-blocks: rich rules: |
この場合、http(ポート80)しか空いていません。
ポート443が空いていない場合は、
/etc/firewalld/zones/public.xml
を修正します。
その後、firewalld を再起動してポートの空きを確認します。
|
1 2 3 4 5 6 7 8 9 10 11 |
# systemctl restart firewalld # firewall-cmd --list-all public (default, active) interfaces: eth0 sources: services: dhcpv6-client http https ports: masquerade: no forward-ports: icmp-blocks: rich rules: |
これでポート80とポート443が解放されました。
再度、certbot-auto を使って証明書の発行を試みます。
|
1 2 3 4 5 6 7 8 9 10 11 12 13 14 15 |
$ ./certbot-auto certonly --standalone -d (ドメイン名 aaa.bbb) Requesting root privileges to run certbot... /home/xxx/.local/share/letsencrypt/bin/letsencrypt certonly --standalone -d (ドメイン名 aaa.bbb) IMPORTANT NOTES: - Congratulations! Your certificate and chain have been saved at /etc/letsencrypt/live/(ドメイン名 aaa.bbb)/fullchain.pem. Your cert will expire on 2016-08-29. To obtain a new or tweaked version of this certificate in the future, simply run certbot-auto again. To non-interactively renew *all* of your ceriticates, run "certbot-auto renew" - If you like Certbot, please consider supporting our work by: Donating to ISRG / Let's Encrypt: <a href="https://letsencrypt.org/donate">https://letsencrypt.org/donate</a> Donating to EFF: https://eff.org/donate-le |
どうやら、無事に証明書が発行できたようです。
発行された証明書
取得した証明書等の実体 は、下記の場所に保存されます。
サーバ証明書(公開鍵)
/etc/letsencrypt/archive/ドメイン名/certN.pem
- このファイルは SSL/TLS サーバ証明書(公開鍵を含む)です。中間証明書や秘密鍵は含まれていません。
- このファイルは Apache 2.4.8 未満 において、SSLCertificateFile ディレクティブで指定します。
- Apache 2.4.8 以降 や nginx では、このファイルは使用しません。
中間証明書
/etc/letsencrypt/archive/ドメイン名/chainN.pem
- このファイルは、Webサイトへのアクセス時にブラウザに提供する中間証明書です。
- このファイルは Apache 2.4.8 未満 において、SSLCertificateChainFile ディレクティブで指定します。
- Apache 2.4.8 以降 や nginx では、このファイルは使用しません。
サーバ証明書と中間証明書が結合されたファイル
/etc/letsencrypt/archive/ドメイン名/fullchainN.pem
- このファイルは、certN.pem と chainN.pem の内容が結合されたファイルです。SSL/TLS サーバ証明書(公開鍵を含む)と中間証明書の両方が含まれています。
- このファイルは、Apache 2.4.8 以上では SSLCertificateFile ディレクティブ、nginx では ssl_certificate ディレクティブで指定します。
- Apache 2.4.8 未満 では、このファイルは使用しません。
秘密鍵
/etc/letsencrypt/archive/ドメイン名/privkeyN.pem
- このファイルは Apache(全バージョン) の SSLCertificateKeyFile ディレクティブ、nginx の ssl_certificate_key ディレクティブで指定します。
注意点
注意点は次の通りです。
- ファイル名の N には、取得した証明書等の番号(発行順で連番)が入ります。
- Let's Encrypt で当該ドメインの証明書を発行したのが1回目の場合には、ファイル名の N は 1 となります。
- 既に証明書等が保存されている状態で再度証明書等を取得した場合には、ファイル名の N が 2 以上の新しい番号で証明書等が保存されます。古い証明書等が上書きされることはありません。
ブラウザから証明書の動作確認
/etc/nginx/conf.d/ssl.conf
に以下のように、
fullchain.pemとprivkey.pemを追記しておきます。
これ以外の作成された証明書ファイルは使用しません。
ssl_protocolsの設定で、ssl_protocols TLSv1 TLSv1.1 TLSv1.2;
と設定して脆弱といわれるSSLv3を除外しておきます。
|
1 2 3 4 5 6 7 8 9 |
listen 443 default ssl; ssl on; # ssl_certificate /etc/pki/tls/certs/localhost.crt; # ssl_certificate_key /etc/pki/tls/private/localhost.key; ssl_certificate /etc/letsencrypt/live/(ドメイン名 aaa.bbb)/fullchain.pem; ssl_certificate_key /etc/letsencrypt/live/(ドメイン名 aaa.bbb)/privkey.pem; ssl_protocols TLSv1 TLSv1.1 TLSv1.2; |
nginxを起動します。
|
1 2 |
# service nginx start Redirecting to /bin/systemctl start nginx.service |
Let's Encryptのサイト
ブラウザから、
https://(ドメイン aaa.bbb)
を開いてみます。
エラーは出ないものの、あっさりした表示になっています。
httpsの左横に鍵マークが表示されません。
Let's Encryptで発行された証明書は、問題ないものの、わかりにくい表示です。
SSL証明書を買ったサイト
ちなみに下記は、格安SSL証明書サービス、SSLボックス から取得した証明書を使った場合です。
ちゃんとhttpsの左横に鍵マークが表示されています。
QUALYS SSL LABSでSSLのテスト
QUALYS SSL LABSのSSL Server TEST
というサイトを使ってSSLのテストを行います。
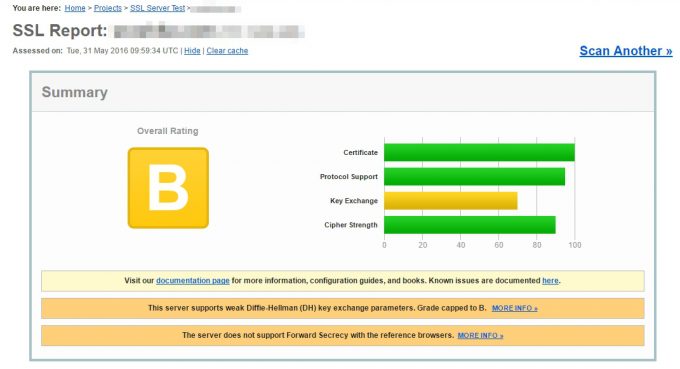
Let's Encryptのサイト
Let's Encryptの証明書を使ったサイトの結果は次の通りです。
Key Exchangeの値が低いものの総合評価はBで、買った証明書よりもむしろ高い評価でした。
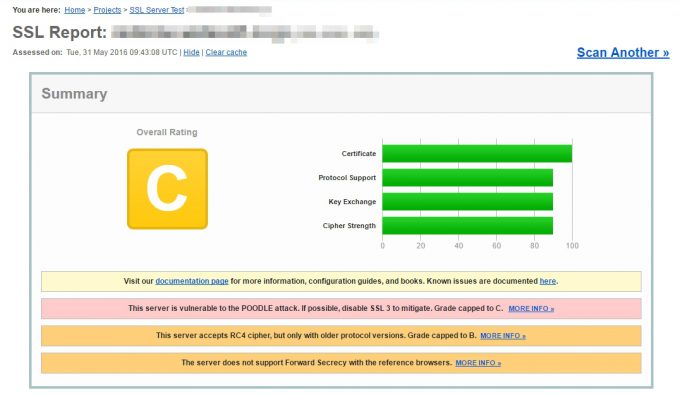
SSL証明書を買ったサイト
から取得した証明書を使ったサイトの結果は次の通りです。
どういうわけか総合評価はCでした。
Let's Encrypt SSLの有効期限の自動更新
Let's Encryptで発行された証明書の有効期限は90日です。
そこで対策として、cron.monthlyを使って、毎月証明書を発行するようにしておきます。
証明書の更新には
certbot-auto renew
というコマンドを使います。
/etc/cron.monthly/create_certificate というファイルを作成します。
中身を次のように記述します。
|
1 2 3 4 5 6 7 8 9 10 |
#!/bin/sh /bin/systemctl stop nginx.servic /home/xxx/certbot/certbot-auto renew /bin/systemctl start nginx.service exit |
これで、証明書が月次で自動更新されます。
このシェルを実行すると次のように表示されます。
|
1 2 3 4 5 6 7 8 9 10 11 12 13 |
# ./create_certificate ------------------------------------------------------------------------------- Processing /etc/letsencrypt/renewal/xxxxxx.com.conf ------------------------------------------------------------------------------- ------------------------------------------------------------------------------- new certificate deployed without reload, fullchain is /etc/letsencrypt/live/xxxxxx.com/fullchain.pem ------------------------------------------------------------------------------- Congratulations, all renewals succeeded. The following certs have been renewed: /etc/letsencrypt/live/xxxxxx.com/fullchain.pem (success) |
SSL証明書を有料で買うには
↓SSLの証明書を買うにはSSLボックス




コメント
[…] […]
[…] […]
[…] […]
[…] […]
[…] […]
[…] […]